In my opinion all great bread starts with a poolish or pre-ferment that has had time to site for 12-16 hours prior to bread making. This can take a little planning and is not always convenient if you need bread right away, but the benefit is well worth it. To top it off the poolish takes all of 5 minutes to make. Combine the following ingredients in a bowl, mix evenly by hand, and cover with plastic wrap. Let it sit for as little as 2-3 hours or as much as 16-18 hours. The longest I have gone is probably close to 20 hours. The longer you go the more “yeasty” the flavor.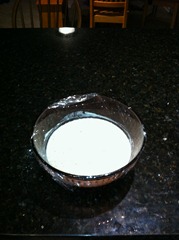
Poolish Recipe
- 1 cup of bread flour (King Arthur is my preference)
- 1 cup of water
- 1 teaspoon Fleischmann’s Bread Machine Yeast
- stir by hand until mixed, cover with plastic wrap, and leave out on the counter for 12-16 hours.
After leaving the poolish out overnight I was ready to make bread for Thanksgiving Dinner at my brother’s place. My poolish had developed a nice aroma and had a lot of bubbles the yeast did its job in the pre-ferment. The bread recipe I used is a take of a basic Pain De Provence recipe I downloaded and printed off the internet somewhere. Please keep in mind that I do not weigh my ingredients so you may need to add a little water or flour to get the dough to the correct consistency.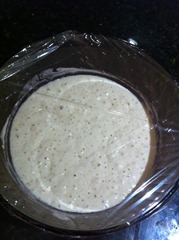
Herbed Bread Recipe
- All of the poolish, previously made
- 2 cups of bread flour
- 1/4 cup of an Italian Herb Blend
- 1 teaspoon of bread machine yeast
- 1 teaspoon kosher salt
- 1/4 cup of water
I use a Kitchen Aid Classic mixer, so I add all the poolish directly to the mixing bowl followed by the water, salt, yeast, & herb mixture and begin mixing with whisk that came with the mixer. Once this is well blended I switch over to the dough hook and begin adding the flour to the bowl slowly in 1/2 cup increments. Once the mixture starts to form a ball, I shut the mixer off and let the dough rest for 5-10 minutes. After the dough rests I run the mixer for another 5-10 minutes to “knead” the bread.
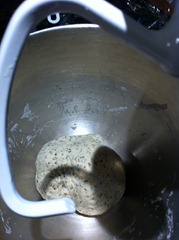 Your dough ball will incorporate any loose bits it touches in into itself as you are kneading. I do not do any window pane testing or anything traditional tests like that to make sure the bread is well kneaded. After you make enough loafs you will start to know when your bread is ready to start the first rise.
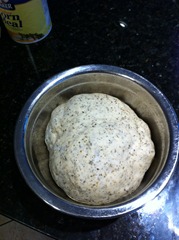 I transfer the dough ball to another bowl that is at least twice the size of the dough ball and that I sprayed with Pam cooking spray. I cover the bowl with a kitchen towel that has been soaked with hot water and rung out. I let the bread rise for 90 minutes to an hour or until its doubled in size. The rise time for the bread is temperature and humidity dependent. The warmer the temperature, the faster the rise. In my case I was good after 90 minutes at 70F.
I rolled the dough out of bowl onto a lightly floured counter top where I then divided the dough into two halves and formed into two small boules. Keep in mind cutting the dough deflates it. I generously dusted a standard cookie sheet with corn meal and placed each boule on the cookie sheet. The corn meal prevents the dough from sticking to the cookie sheet.
I take the same kitchen towel used previously and lay it over the boules. I leave the cookie sheet on top of the oven for a second rise for 45-60 minutes, checking progress after a half an hour. Once doubled I pre-heat the oven to 425F.
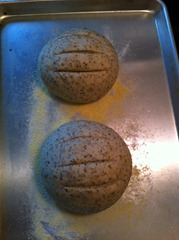 When the loaves are ready to go into the oven I score the tops making three slits with a sharp knife. Its important that your knife is sharp here, razor blade sharp. Make sure that your slice goes no more than 1/4” deep.
I bake the loaves in my electric oven for 12 minutes than I turn the cookie sheet 180 degrees and finish the loaves for another 8 minutes. Its important to note that baking times will vary. Check the bread by tapping it on the bottom. You should hear a hollow sound when flicking the bread with you finger. Not exactly scientific I know, but I have found that a lot of bread making is done my feel/experience. The more you do it the easier it becomes.
When your bread is done let it cool for 30 minutes before you enjoy. Don’t worry it will still be warm after 30 minutes. Think of it like resting a nice steak. It makes a difference.
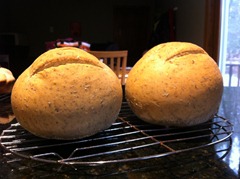 This was a well liked recipe by my family. I was a little skeptical using a store-bought blend of pre-mixed Italian Seasoning, but the end result was really good. A great herb flavor developed that was great on its own, or with butter. I think next time I need to add some minced roasted garlic.

2 comments on “Nice Loaf”