The First Coat:
With a color selected, and after some internet research we stayed away from the big box store paint and decided to try Benjamin Moore’s Regal Select water based latex paint in a semi-gloss finish. I believe this paint was close to $40.00 at our local Ace Hardware store, and it supposedly can be used without a primer. I was skeptical when I heard that statement, but figured that explains the price tag of twice as much as your box store paints. I was painting over two coats of Kilzs2 primer that I had knocked down with some 220 grit sand paper after the second coat dried. I blew off the entire headboard with compressed air, and hit it with a tack cloth before I was ready to lay the first coat of color on.
I had already removed the back panels where the built-in shelves were to allow for easier access to paint the inside. I also decided to experiment with using a foam brush instead of a 2” angle brush for the color. I also use a small foam roller for the larger surfaces.
The foam brush worked great and really helped to get the paint inside all of the nooks and crannies that this piece has. With the top cornice complete I jumped down to the built in shelves. In the photo below, you can see I removed the right side of the shelves as well as the bottom shelf which is designed to be removable after the headboard is re-assembled.
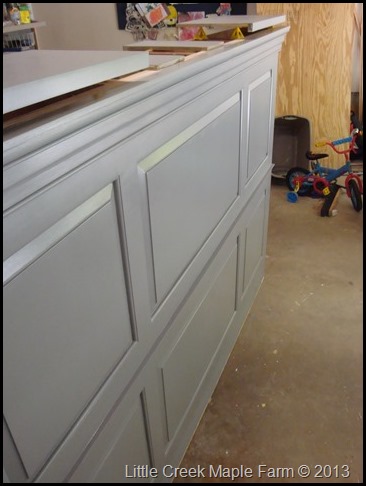
The one good thing about this headboard is that it was easy to paint. I am not sure if that is because of the paint or possibly because the majority of the surfaces were vertical. Painting the front was fairly easy, I just hit all the nooks in the raised panels and then hit the flat surfaces with the foam roller making sure to keep a wet edge I focused on one panel at a time and worked from right to left. The trim board I used to divide the top and bottom panels really helped to keep the painting areas to small manageable pieces. Once I completed a panel I made sure to back roll everything to eliminate any brush strokes and try to maintain a smooth uniform surface/texture. The small foam roller really was leaving a mostly flat surface with very little texture.
It wasn’t long before I had most of the headboard complete. This paint was phenomenal. I have made two other projects with painted finishes and neither brand of paint I used had the coverage or ease of application as this gallon of Regal Select paint by Benjamin Moore. To try out the primer aspect of the paint I figured I would roll the very bottom of the headboard on the front surface which I did not prime with Kilz primer to see if you really could use this paint without a primer. As you can see from the photos below the first coat went over the bare plywood with no issues and looked very similar to what I had primed earlier.
The Second Coat:
The first coat had already started to dry as I finished the piece, but I decided to let the first coat sit a day or so before second coating the headboard. Due to my hectic schedule at times the piece sat for a good couple days before I applied the second coat, but as I did for the first coat I started at the top, and worked my way from right to left as I painted the piece. This time I used my 2” angle brush so I could compare the foam brush versus the bristle brush. Surprisingly I actually preferred using the disposable foam brush, but pushed on with the bristle brush for the second coat. The coverage of this paint was great. I had never two coated raw wood and really had the paint stick like this paint was sticking.
Another new purchase for me with this project was these nifty little yellow painting pyramids. They are awesome at getting your work up off the surface you may be painting on and well worth the couple bucks for 10 of them.
With the second coat of paint complete, I left the headboard to dry for another couple of days.
I then came back and installed the removable pieces that make up the built-in shelving system at each end.
I ran out of fabrication space in the garage to finish the top, so when we move this up to the bedroom I can crank out the top of the headboard and complete this project.


1 comments on “Headboard 6.0 – First Coat”