This is my first foray into making base cabinets. It’s also some good prep for a project the wife has on my woodworking to do list. So the back wall of my garage stall, I mean woodworking shop, has a 7’-0” section of drywall that I will be re-purposing for some cabinets. This will also be the place where I can wedge my mobile miter saw cabinet that is currently under construction. The goal is to have storage for some tools, additional counter top / assembly space that can also double as supports for long boards that I will be cutting on the chop saw. As always I rough something out in sketch form on paper to get a rough idea of sizes and large cut pieces. I am not a cabinet guy, but have seen enough pre-built cabs to take a stab at building my own.
The boxes will be relatively simple plywood boxes with two drawers at the top and a pair of doors below the drawers. The cabinets will have 2×4 pressure treated bases that I will eventually cover up with a 4” vinyl base to clean up the look. I started with the PT bases. I made them slightly less than the width of the cabinets, and 3-1/2” shorter than the depth of the cabinets to create a toe kick.
After the bases were complete I rough cut the sides, bases, and some rails out of the 3/4” poplar plywood I had previously purchased. I rough cut the 8’ sheets of plywood on my saw horses with a 4’ straight edge. I would end up with sheets of plywood that are 25”-30” in length by 48” in width which are much easier to handle by yourself on the table saw. I then cut all the sheets to final dimension on my table saw. With everything sized, I turned my attention on the rabbets that I planned to make on the sides. If you refer to the sketch above I have a rabbet on the bottom of each side and on the back of each side.
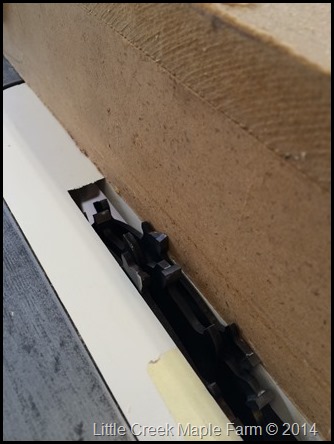
I set the saw up wit a stacked dado head set, and clamped a sacrificial fence on my saw’s fence and we were ready to rabbet. The rabbets where all 3/8” deep by 3/4” wide. to receive the plywood.
With the rabbets cut it was time for some assembly. For times sake I chose to glue and nail the boxes with brads. I stood the sides of the cabinets up on what would be the front edge of the cabinet, stood the bottom of the cabinet up in the rabbets and laid the rails across the back of the cabinets, and fastened everything together after gluing and clamping. I attached the 2×4 bases and had to do a quick mock-up.
The back of these cabinets will be about 6-7” off of the face of the drywall wall. This is to allow for a future dust collection system to be piped in the back. Additionally lets me use the miter saw while the front of the miter saw cabinets is flush with the face of the new base cabinets. Eventually the Miter Saw Cabinet will get poplar doors and drawer fronts to match the base cabinets.
After playing around with dimensions, I decided on the depth of the drawers and glued and nailed the front rails and divider for the two drawers, because of the huge pain it was to install the drawer slides after the fact on the Miter Saw Cabinet, I decided to install the slides now before the top rail and the counter tops are installed.
The slides were a piece of cake. I use a 1/2” thick piece of plywood laid front to back to use as a spacer for the slides. When I am ready to install the drawers in the future I will use a 1/4” thick spacer. The slides are set about a 1/16” back from the front edge of the cabinets and attached to the sides with three screws.
With the drawer slides installed on both cabinets I nailed the top rails in place and was ready to level and install the base cabinets in their final location.
I had to remove my adjustable shelving that was on this wall and install some ladder frames to space the cabinets 7”+/- off the back wall. Eventually there will be some removable filler panels on the sides and the front middle area where my miter saw will go. All the cabinets were shimmed, leveled, and fastened in space. In my next window of free time, I will probably focus on either the counter top or the cabinet drawers and doors. I am still on the fence on whether I should edge band the plywood with veneer tape or some solid wood edging…


Pingback: Garage Work Shop Storage – Solid Wood Edging « Little Creek Maple Farm
Pingback: Garage Work Shop Storage – Drawers « Little Creek Maple Farm